
With this tutorial, you will learn how to easily control your Robotis Dynamixel servomotors from your computer thanks to a Bluetooth connection. This makes it easy to perform your tests and saves you from annoying cable connections.
Required hardware
- 12V/5A power supply.
- BT-410 Dongle module.
- BT-410 Slave module.
- Dynamixel servomotor (here an MX-28).
- OpenCM9.04.
- OpenCM485
- 3 (or 4) pin cable for Dynamixel.
- Micro USB cable.
Required software
- Arduino.IDE.
Installation
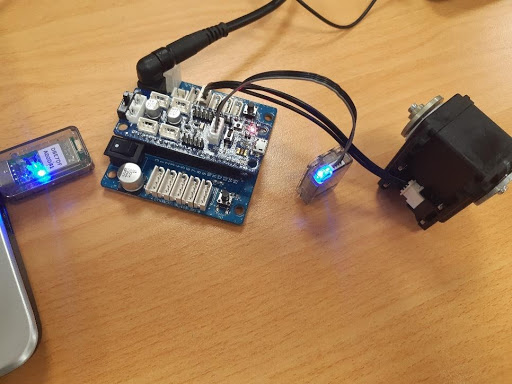
Connections:
- Connect the OpenCM9.04 board to the OpenCM485 EXP board.
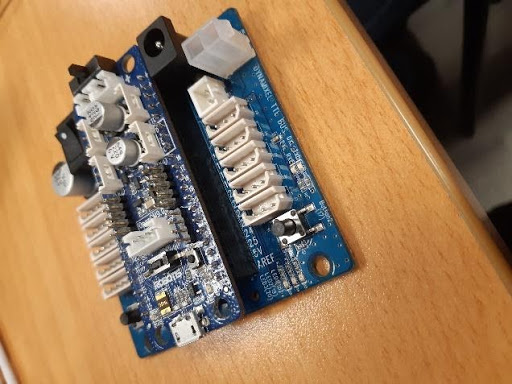
- Connect the servomotor to the OpenCM485 EXP via the 3 (or 4) pin Dynamixel cable.
- Connect the BT-410 Slave to the OpenCM9.04 board on the UART port.
- Connect the OpenCM9.04 board to the PC via the micro USB cable.
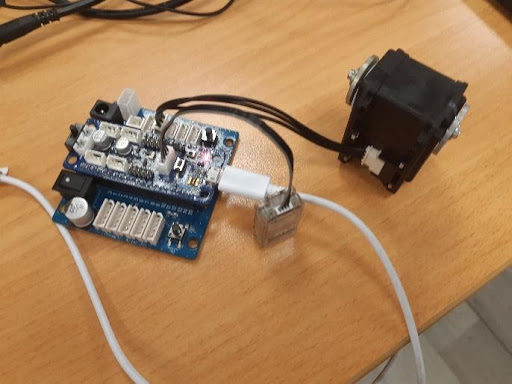
The OpenCM9.04 board is switched on and the BT-410 module flashes blue.
Software:
- Download the Arduino.IDE software.
- Launch Arduino.IDE, go to File , then Preferences .
- In Preferences , enter the following link into the Additional Boards Manager URLs field: https://raw.githubusercontent.com/ROBOTIS-GIT/OpenCM9.04/master/arduino/opencm_release/package_opencm9.04_index.json
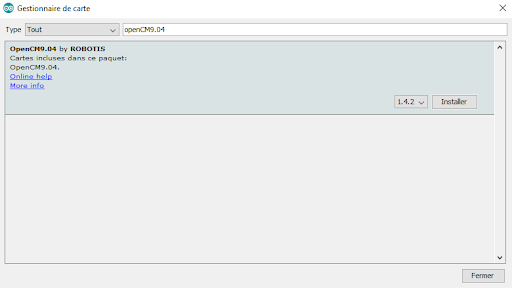
- Go to Tools , then Board Type and click on Board Manager .
- Search for the OpenCM9.04 by ROBOTIS section and press install button.
- Close the Arduino.IDE software, then launch it again.
- Go to Tools , and then Board Type . From the list, select OpenCM9.04 Board .
- Go to Tools , then to Port . Select the port corresponding to the OpenCM9.04 board.
Operation
Setup
- Launch Arduino.IDE.
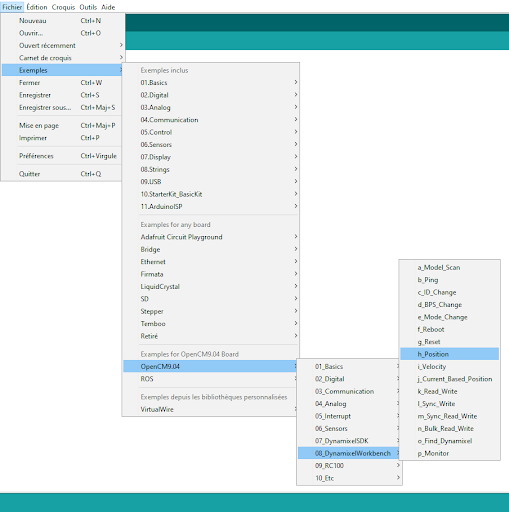
- Go to Files ? Examples ? OpenCM9.04 ? 08_DynamixelWorkbench , then click on h_Position .
- A new window opens with the setup program required to control the servomotor.
Program
- Write the program you want.
- Download the program onto the OpenCM9.04.
- Unplug the OpenCM9.04 board from the PC
- Power the OpenCM485 EXP board using the 12V/5A power supply and press the switch.
- Connect the BT-410 Dongle module to the PC. Bring the two modules closer together in order to pair them. The modules are synchronized when the flashing stops.
- From the Arduino.IDE software, go to Tools , Port and select the port corresponding to the BT-410 Dongle module.
- Open the serial monitor to communicate with the OpenCM9.04 board. The monitor must be set to 57600 baud.
Examples of programs
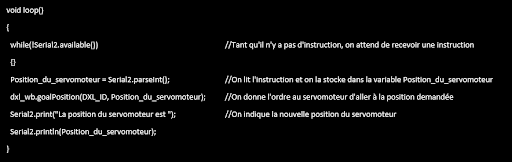
Controlling the servo motor
Allows the position of the servo motor to be selected between position 0 and position 4095.
- Enter the code line « int Position_du_servomoteur ; » below the code line « DynamixelWorkbench dxl_wb; ».
- In the void setup() function, enter the code line « Serial2.begin(57600); ».
- In the void loop() function, enter the following lines of code:
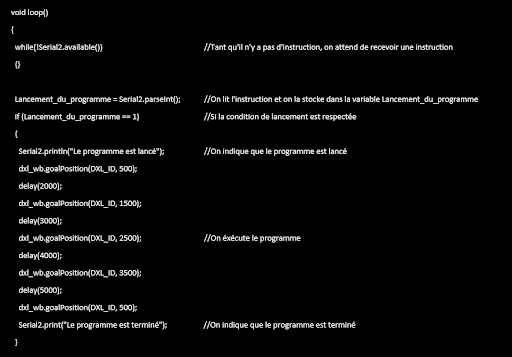
Series of positions
Allows to launch a series of predefined positions when a specific command is given (here, the command is “1”).
- Enter the code line « int Lancement_du_programme ; » below the code line « DynamixelWorkbench dxl_wb; ».
- In the void setup() function, enter the code line « Serial2.begin(57600); ».
- In the void loop() function, enter the following lines of code:
